Self-host Vaultwarden: your password manager in 14 MB of RAM
Published 2026-10-08 · tested on Ubuntu 24.04, Intel Core Ultra 7 255H, Docker 29
TESTED — we actually deployed this
Vaultwarden is an unofficial, lightweight server for Bitwarden clients — the entire Bitwarden experience (browser extensions, mobile apps, web vault) backed by a server you own, written in Rust. Bitwarden’s own self-host deployment wants multiple containers and ~2 GB of RAM; Vaultwarden runs in 14 MB. Not a typo — we measured it.
Every Bitwarden client works with it: point the official apps at your server URL and everything syncs.
Before you start: the HTTPS wall
Here’s the thing every first-timer hits (we hit it too, deliberately): the web vault refuses to work over plain HTTP. The browser crypto APIs Bitwarden clients use require a secure context. Deploy on http://localhost:8080, try to create an account, and you get:
Error: Insecure URL not allowed. All URLs must use HTTPS.So unlike most self-hosted apps, TLS isn’t a “later” step — it’s step one. The cleanest fix is running Caddy alongside, which handles certificates automatically. That’s what we do below.
The Compose file (Vaultwarden + Caddy)
services:
  vaultwarden:
    image: vaultwarden/server:latest
    container_name: vaultwarden
    environment:
      - DOMAIN=https://vault.example.com
      - SIGNUPS_ALLOWED=true
    volumes:
      - vw-data:/data
    restart: unless-stopped

  caddy:
    image: caddy:2
    container_name: vw-caddy
    ports:
      - "443:443"
      - "80:80"
    volumes:
      - ./Caddyfile:/etc/caddy/Caddyfile:ro
      - caddy-data:/data
    restart: unless-stopped

volumes:
  vw-data:
  caddy-data:
And the Caddyfile:
vault.example.com {
  reverse_proxy vaultwarden:80
}
With a real domain pointed at your server, Caddy obtains a Let’s Encrypt certificate automatically — zero TLS configuration. For LAN-only/homelab use without a domain, change the Caddyfile site to localhost:8443 with tls internal (self-signed, you accept the browser warning) — that’s exactly how we ran our test — or better, use Tailscale and its built-in HTTPS certs.
Note Vaultwarden itself exposes no host port — only Caddy is reachable. That’s intentional.
docker compose up -dFirst account, then lock the door
- Open your vault URL → Create account → use a long master passphrase you’ve never used anywhere else. There is no recovery: lose the master password, lose the vault.
- Immediately after creating your account, disable public signups — this server is on the internet and open registration on a password manager is a standing invitation:
    environment:
      - SIGNUPS_ALLOWED=false
docker compose up -d again to apply. Existing accounts are unaffected; new registrations are blocked.
- Point your clients at it: Bitwarden browser extension / mobile app → settings gear at the login screen → “self-hosted” → your URL.
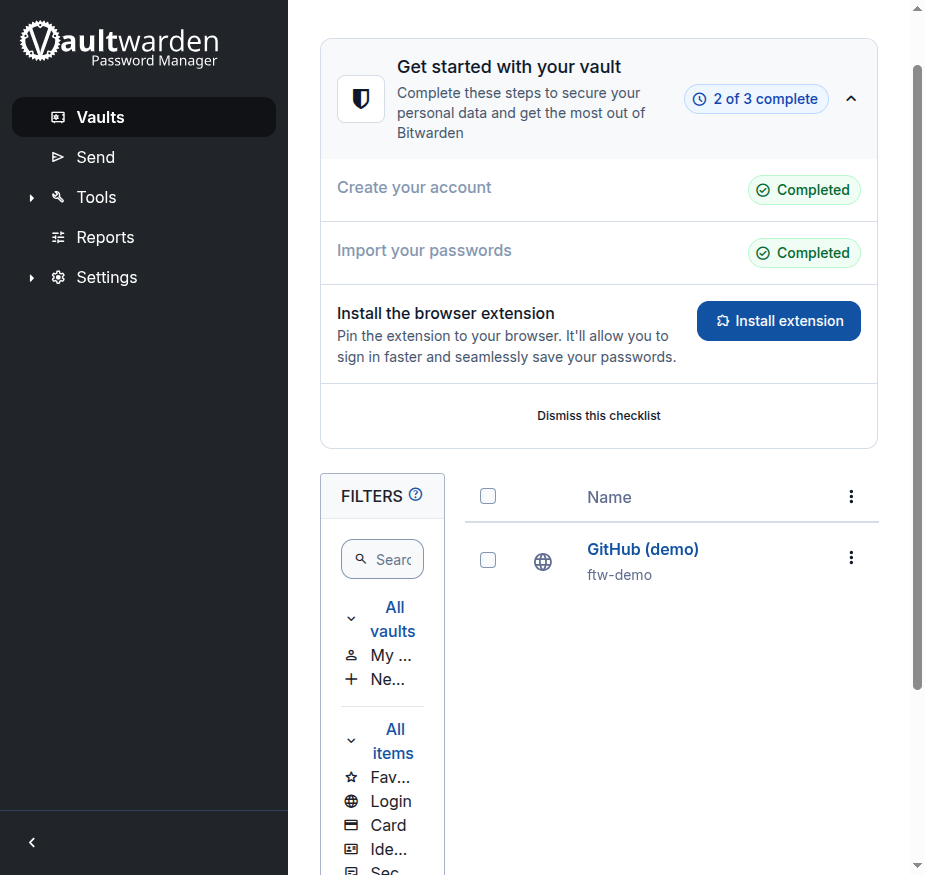
What it costs to run (measured)
| Metric | Measured value |
|---|---|
| Image size | 86 MB |
| RAM (vault active, 1 user) | 14 MB |
| Caddy alongside | 19 MB |
| CPU idle | 0.00% |
| Data volume (1 user, SQLite) | 0.4 MB |
| Restart to ready | 1 s |
This is the lightest self-hosted app we’ve tested — 30x lighter than n8n, 10x lighter than Uptime Kuma. It runs on anything: a Pi Zero, the smallest VPS in existence, or squeezed alongside everything else on a free Oracle VM without noticing.
Backups are not optional here
This isn’t a media server where losing data means re-ripping DVDs. This is every password you have. The entire state lives in the vw-data volume (SQLite + attachments + RSA keys):
docker run --rm -v vaultwarden_vw-data:/data -v "$PWD":/backup alpine \
  tar czf /backup/vw-backup-$(date +%F).tar.gz -C /data .
Cron it daily, keep copies in two places (one off-site — even a private git repo or rclone to any object storage), and test a restore once. Also: each client keeps a full offline cache of the vault, which is an accidental extra backup — but don’t rely on it.
Gotchas
- HTTPS is mandatory (see above) — the #1 “it doesn’t work” cause
- No recovery without email: password hints and 2FA-reset flows need SMTP configured (
SMTP_HOSTetc.). Without it, a lost master password is unrecoverable by design - The admin panel (
/admin) is disabled until you setADMIN_TOKEN— generate withopenssl rand -base64 48, and treat that token like a root password - Updates matter more than usual — this is security software.
docker compose pull && docker compose up -dmonthly at minimum; watch the Vaultwarden releases for anything marked security - Vaultwarden is an unofficial implementation — it trails Bitwarden’s newest features (e.g., some enterprise SSO). For personal/family use, parity is excellent
When NOT to self-host this
- You won’t maintain backups. Seriously — Bitwarden’s official cloud is free for personal use and their infrastructure team is better than your cron job. Self-host for ownership, not to save $0 that Bitwarden already charges.
- The server is sometimes-on. Clients cache the vault offline so brief downtime is survivable, but syncing new passwords needs the server up. Our test machine is a workstation; a real deployment wants an always-on box — the free Oracle VM or any ~$4/month VPS massively over-serves Vaultwarden’s 14 MB footprint.
- Multiple non-technical family members depend on it and you’re the single point of failure. If you get hit by a bus, so do their passwords.
What we actually ran this on
- Machine: Intel Core Ultra 7 255H (16 cores), 30 GB RAM, NVMe
- OS: Ubuntu 24.04.5 LTS, x86_64 · Docker: 29.8.1
- Vaultwarden: 1.37.4 (web vault 2026.7.0), SQLite backend
- TLS: Caddy 2 with
tls internal(localhost test setup) - Verified: account creation, vault item CRUD, restart persistence
- Date: 2026-10-08